Microscope camera test – E3CMOS 12MP
“To cam or not to cam, that is the question…”
What is the best way to take photos on a microscope – an SLR or a dedicated microscope camera (or “cam”)? Hopefully, over the next few posts I will try to show some results and do some comparisons.
Following on from Jo and Keith’s mini-review of some microscope cameras, here are a few more test images. The test subject is a diatom, Navicula (Lyrella) lyra, part of a Kemp 8-form test plate (“a good qualitative test of both microscope and microscopist”). I have done my best to maintain a similar focus point between images – the aim was to keep the spots surrounding the central region of the diatom in focus. Full disclosure: many of the products tested are available for sale on my website micro-science.co.uk . However, I try to give objective assessments of the products tested and don’t have any particular reason to recommend one supplier over another.
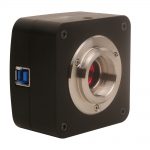
Microscope camera 12MP E3CMOS USB3 with a Sony Exmor sensor (Touptek) with 0.5x adapter mounted on an iScope 1153PLi.
The original images were uploaded at 4000×3000 pixels but this site crops them to 1200×900 for web display. If anyone is interested in the full size images, then please send me an email. Images shown are only modified by cam software, not processed afterwards.
As with other Touptek cams, the software is Toupview (3.7) and I have found it intuitive and full-featured for Windows. It includes a stacking feature which I use often (called extend depth of field, EDoF) for still images. There are also a number of video functions which I have not used. There is Mac software too but it lacks some of the functionality (including saving RAW files). See footnote regarding measuring spores, etc with Toupview.
The iScope objectives used here are described as being both plan and achromatic* (see footnote for more info). I reviewed the iScope last year and the results still stand – and no reported issues with the 60x objective, which was one of my concerns at the time. For general biology use, it is still a good all-round performer but I have found that achromatic objectives have their limits. However the use of a green filter can help overcome these limitations considerably and squeeze a bit more performance out of the objectives at no extra cost (green and blue filters are included with most microscopes).
The effect of chromatic aberration can be seen in the image sequence above. On close inspection, the first diatom 1000x image (photo 2, labelled “unfiltered”) has faint yellow and purple halos around the edge of the dots. For photography, this effect can be greatly reduced by the use of a green filter placed over the light source which limits the wavelength of light passing through the sample (see photo 3). Toupview allows the white balance to be easily calibrated to accommodate the green background. Adjusting saturation levels or switching to black and white within Toupview produces images 4 and 5 respectively.
For comparison, an image taken with a very high quality (N.A. 1.4) apochromatic objective taken with the E3CMOS 12MP is also shown (photo 6) – virtually no chromatic aberration is visible even though no green filter is present. With this particular test subject, the iScope achromatic objective produces good results with the green filter in place for a fraction of the cost (to give some perspective: a single apochromatic objective, without a microscope attached, costs several times as much as an entire iScope with 5 objectives fitted! The small amount of extra detail gained comes at a very high price).
The gallery below shows the cropped centres of three of the images above at 100% size. When viewed at this size the performance of the different objective types becomes more apparent. This also shows the value of diatoms for testing microscopes. Each of the dots visible on Navicula lyra is about 0.5um in diameter by my measurement.
I thought I would quickly check the background noise level by taking a photography with no light passing through the sample with the E3CMOS (Sony sensor) and L3CMOS 5MP (Aptina sensor). I was surprised at the difference. The E3CMOS image was completely black, which does seem to substantiate the manufacturers claims that the low noise of the sensor would make it particularly useful for darkfield or astronomy use. The L3CMOS camera image does show some random background noise.
Below are some images which I have taken of real-world subjects over the last few weeks with the E3CMOS 12MP. These images have been stacked in Toupview then cropped and modified for web use in GIMP (usually reduced in size, sharpened slightly and saturation boosted by about 5-10%). They show only what has been possible in normal use. In this gallery, I have shown images taken with the very best quality apochromatic optics available to try to ensure that the camera output is not limited by the input from the microscope.
Spec sheet
| Sensor & Size(mm) | Pixel(μm) | G Sensitivity Dark Signal |
Binning |
|---|---|---|---|
| 12M/IMX226(C)1/1.7″(7.40×5.55) | 1.85×1.85 | 280mv with 1/30s 0.1mv with 1/30s |
1×1,2×2 |
The verdict so far..
I like the E3CMOS 12MP – the image quality seems very good with no problems except a quirk in the measurement software described in the footnote. Subjectively, the colour reproduction seems faithful. The cam is small, easy to use, plugs straight into your computer and does not require an external battery. I have been using a USB2.0 laptop and it the speed has been fine for still imaging (however, video recording may need a USB3.0 computer). Whether the extra pixels are worth it or not remains to be seen, as I invariably need to scale the image down for web use. A large image does give you the option of cropping down to an interesting region of the photograph without losing image quality. If you are printing your images, then the extra pixels should allow you to produce large images without losing resolution.
With the test images here taken at 1000x , the E3CMOS 12MP seems to be able to hold it’s own with the best objectives available. It seems likely that your microscope objective would limit the quality of your photographs before this camera would.
A few more images…
I compared a specimen of the capillitium of Arycria ferruginea with the LCMOS 5MP, E3CMOS 12MP and a Canon 70D (with Euromex 2x adapter) at 1000x on an iScope with green filter. As they have different pixels counts the images were of different dimensions but have been reduced in size by the website for display.
This is quite a tricky subject to photograph as has complex surface ornamation. I found it much easier to take images with the cams rather than the SLR. It is much easier to set white balance, focus and set exposure time using the cams. I have used Canon Live software view for macrophotography, so know how to use it reasonably well. However, I found it quite clunky for microscopy use and getting the white balance right was a challenge.
I also rapidly stacked about 5 images at different focus points using the cam software in under a minute each. This would be much more time consuming using the SLR as you would need use external software such as Zerene stacker .
Conclusion
This was a pretty quick test and the focus of the subject was not identical between images. However, I think the E3MOS 12MP wins the comparison for me for ease-of-use, speed and image quality. The SLR has potential to take good photographs with extra work but was much more difficult to use quickly. The E3CMOS 12MP is the best solution I have found so far for microscope photography if you are prepared to pay the price. If you are on a budget then the LCMOS 5MP and L3CMOS 5MP produce pretty good results for the price. The Touptek camera adapters are also recommended.
———————————————————————————————————————-
*Plan objectives mean that the field of view is kept evenly focused across the whole field of view. I can confirm this is true in general use of the iScope but would not be noticeable in the test images as only the centre of the whole field-of-view is visible.
Achromatic objectives are the most widely used type in general laboratory microscopes. They bring two colours (red and blue) into a single focus point and also correct for green spherical aberration. This limited correction of wavelengths can lead to colour fringing around the edges of high-contrast areas (often manifesting as purple and yellow halos). While colour fringing (or chromatic aberration) is not a great problem during routine microscopy, it tends to become more noticeable during colour photography. Apochromatic objectives which correct for more wavelengths of light are expensive. However, I managed to get hold of some to do some testing.
Footnote regarding measuring and calibration with Toupview 3.7.
Several of us encountered a similar issue when trying to calibrate/measure images. Setting up the calibration seemed straightforward, but when we measured (even after setting the scale to micrometers) the results came out in pixels.
However, the issue is simple to resolve.
Once you have set up calibration, go to “Image” menu then go to “Resolution” and change the magnification to “10x” or whatever objective you are using. Now try measuring things and it seems to work fine – it comes out in micrometers. Plus you can add a scale bar any size you want. N.B. Personally, I prefer Piximetre for spore measurement and analysis (free software).
Postscript 7/1/18 Comparison of 6.3MP and 12MP cams field size using a 0.63x Leica adapter on a DMRB.
A few images to show the difference between fields of view (FOV) for 12MP and 6.3MP cams when using a 0.63x Leica adapter on a DMRB. Total field is shown by photographing with phone camera via 22mm 10x eyepieces. As you can see the images are quite tightly cropped to the centre using this adapter but I find this acceptable in normal use.
Please note : these are images shown are a botanical specimen on a prepared slide to show the crop size. Due to the thickness of the cross-section, areas appear slightly out of focus.
12MP images are 4000 x 3000 px
6.3 MP images are 3072 x 2048 px
20MP images are 5440 x 3648 px
A few full size images of taken with 100x objectives from each cam – you should be able to right click on the full size images to download them for comparison. These were taken on a range of different microscopes and optics, so quality variation is a combination of subject and objectives rather than the cam used. All cams use the same Sony Exmor sensors.


